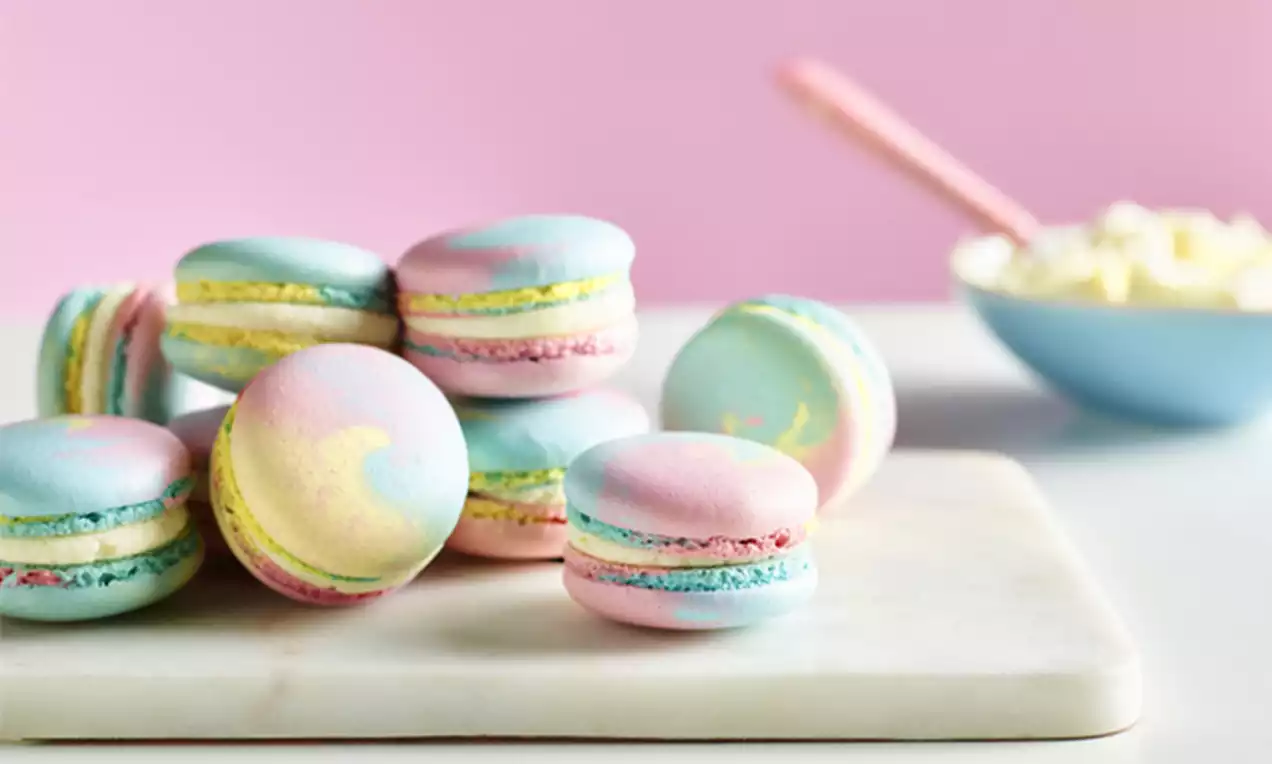
Pastel Macarons
Ingredients
Preparation:
Line 2 large heavy-metal baking trays with baking parchment.
Put the icing sugar and ground almonds in a food processor and pulse 10 times, then blitz for a further 10 seconds, to make a fine powder. Sieve into a bowl, and discard any coarse grains that remain in the sieve. Weigh the almond and icing sugar mix and divide into 3 equal portions.
In a clean, grease-free bowl, add 2 egg whites then whisk until foamy. Add the Cream of Tartar and whisk the Egg White until very thick and stiff.
Gradually whisk in the sugar, in 3 batches, to make a thick, glossy meringue which forms stiff peaks on the whisk beaters. Weigh the mixture and divide equally between 3 clean bowls.
Add a few drops Pink Gel Food Colour to one bowl. Add a few drops of Blue Gel Food Colour to another, and add a few drops of Yellow Gel Food Colour to the other bowl.
Working on 1 meringue at a time, take 1 portion of the almond and icing sugar mix, and sift one third on to the meringue. Using a clean spatula, carefully work into the almond and icing sugar mix into the meringue, scraping, turning and cutting the meringue into the dry ingredients, rather than stirring it. Once combined, sieve half the remaining almond and icing sugar mix on top and continue in the same way, and then sieve in the final batch of almond sugar, and incorporate in the same way.
Once you have combined the ingredients together, continue working the batter by flattening the mixture against the side of the bowl, and then scraping and turning it again in order to achieve a smooth, dropping consistency. Repeat these steps with the other portions of meringue and almond sugar. Add a few more drops of colour if you would like a brighter shade.
Fit a large piping bag with a 1cm (1/2 inch) plain round nozzle. Fold back the bag by about one third in order to allow you to spoon the mixture into the bag more easily. Resting the piping bag on the work surface, spoon the pink almond mix into the centre of the bag and smooth it into a long rectangular shape. Carefully spoon the blue mix on top, and gently spread over the top of the pink. Finally, spoon over the yellow and spread it to cover the blue.
Holding the bag end closed, gently push the mixtures towards the nozzle, then carefully gather up the bag and holding the bag with the nozzle upright in the air, twist the bag closed. Now you are ready to begin piping.
Hold the bag with the nozzle pointing down then pipe 4cm (1 ¾ inch) flattish rounds onto the lined baking trays spaced a little apart (twist the bag occasionally to keep a steady flow of mixture). You should be able to pipe 28 rounds.
Preheat the oven to 150 C/130 C fan oven/gas mark 2.
Lay a thick towel on the work surface. Holding a tray firmly at either side, gently tap the tray about 20 times on to the towel, to smooth and settle the tops. Pop any air bubbles that rise to the surface with a clean pin or cocktail stick. If the piped nozzle tail is still visible on the top of the macarons, you can gently push it into the mixture with a wetted finger. Repeat with the other tray and leave the trays to stand at room temperature for about 30 minutes, until a slight skin forms on the surface – the outside should be dry, not sticky, when touched lightly with your finger.
Bake the trays, one at a time, on the middle shelf, for about 40 minutes until firm – the bases should be firm when cooked, and the tops crisp and should not wobble. Leave to cool for about 15 minutes on the tray until you can carefully peel the macaroons from the parchment. Transfer to wire racks to cool completely.
To decorate, pop the buttercream into a piping bag fitted with a circular nozzle. Pipe the buttercream in a circular swirl over the flat side of half the shells. Alternatively, use a small palette knife to spread the icing neatly. Sandwich the halves together. Your pretty macarons are now ready to present and enjoy!
Related Recipes

Dessert and After Dinner Recipes
Mirror Glaze Chocolate and Raspberry Bombe

Dessert and After Dinner Recipes
Pastry Lattice Crown

Dessert and After Dinner Recipes